Getting Started With Elasticsearch
Red Badger recently became Elasticsearch’s first UK partner and after attending one of their training sessions in October, I wanted to share some tips to help you start experimenting with this powerful search technology.
Big companies like GitHub, SoundCloud and Foursquare have vast amounts of data and need to give their users an exceptional search experience. So why are they turning to Elasticsearch to provide it?
The simple answer is that Elasticsearch enables your data to be queried in near real time with a whole host of optimisations built on top of Apache Lucene that make it easy to handle complex features like full text search and distributed scaling - all through a RESTful interface.
Sounds good? Let’s get started…
Installing
I’ll be covering the Mac OS X setup and i’d recommend installing via Homebrew. (If you’re on Windows you’ll want to download the .zip here and follow these instructions. Mac users can open a new Terminal and run:
$ brew install elasticsearch && brew info elasticsearch
This will give you a bunch of information about your installation, we want to start the Elasticsearch service with:
$ launchctl load ~/Library/LaunchAgents/homebrew.mxcl.elasticsearch.plist
If you are prompted to install a Java runtime - go ahead and do that as both Elasticsearch and Apache Lucene are written in Java. Finally, install the Google Chrome browser extension Postman - we’ll be using it throughout this tutorial as it provides an easy way to test out the Elasticsearch API, particularly when feeding it data [1]. Hopefully you will see how easy these queries are to construct and can start thinking about how to integrate them within your own application code.
Once you’ve installed Postman you can confirm the Elasticsearch server is running by making a GET request to localhost:9200. Click the send button and you should see the output in the body:
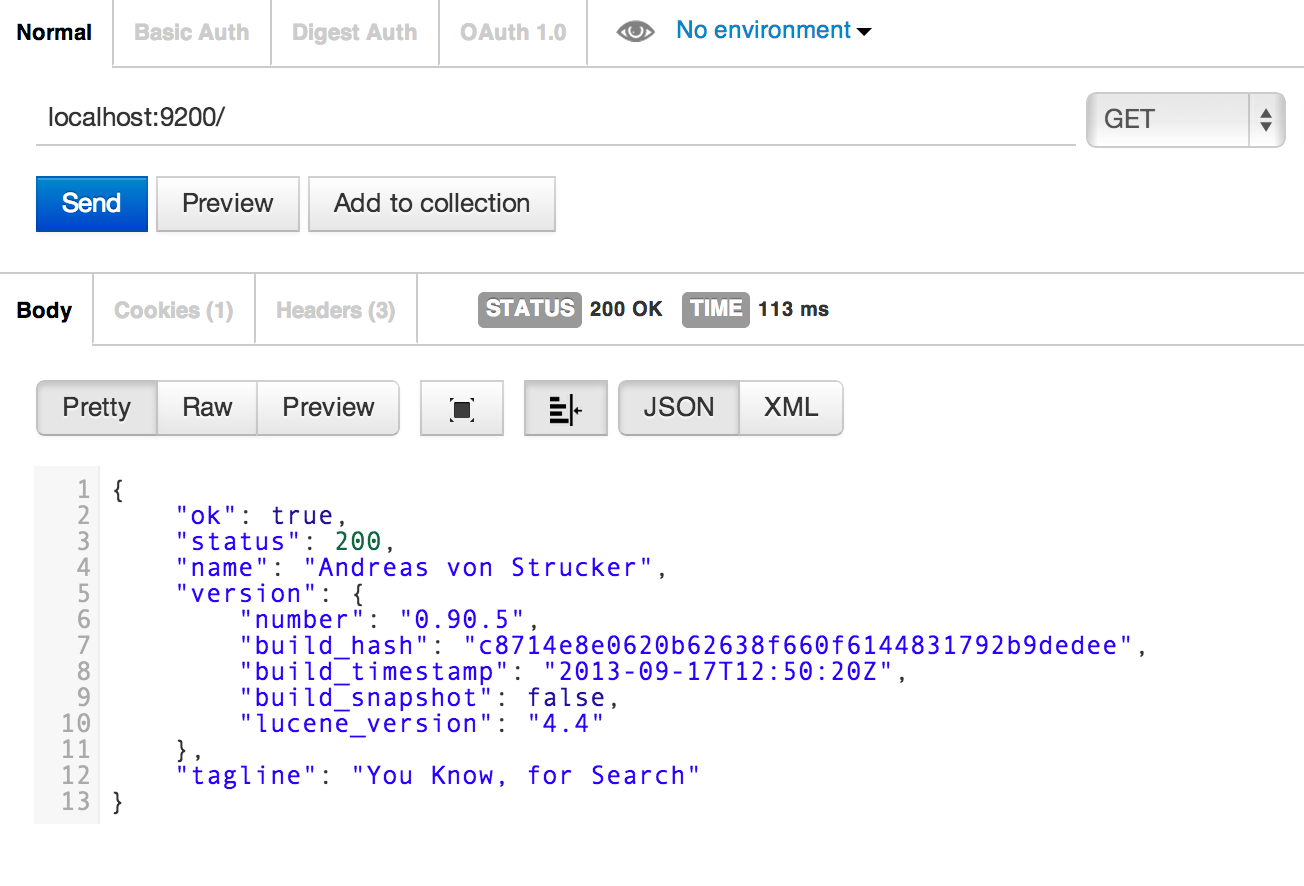
Here we can see the first demonstration of Elasticsearch’s RESTful API, we simply asked it to GET the Elasticsearch instance and it returned information about the current version.
Creating An Index And Type
Let’s move on to create our first index - the equivalent to a database in traditional SQL terminology. We want to create an animal index and to do that we can send a PUT request to the URL localhost:9200/animal. After clicking the send button you should receive confirmation in the body that the index has been created:

Pretty straightforward. Now an index by itself isn’t much use, we need to create a type (conceptually similar to a SQL table) where we can store our data. We’ll create a badger type with a mapping that specifies what fields we expect each badger document to have. Defining the mapping is actually optional because Elasticsearch is schema free by default however, in general, I find it’s often better to be explicit about what data you expect to be stored.
To create the badger type, select PUT from the dropdown on the top right hand side and enter the URL localhost:9200/animal/badger/_mapping. Below that you need to click the raw button and change the dropdown next to it from Text to JSON - this will allow you to enter JSON as part of your request. We specify our mappings in JSON because all documents in Elasticsearch are represented as structured JSON.
We’ll create the badger type with three string fields - name, role and bio - you can get the JSON needed to create the mapping here.

After clicking send, you should again receive confirmation in the body that your request was successful.
Now we are ready to start creating our own documents that will be stored under the badger type but first you can review what we have done so far by sending a GET request to localhost:9200/animal/_mapping:

Adding Data
We’ll add data to the badger type using Elasticsearch’s bulk API. The format for a bulk request is:
{action_and_meta_data}\n
{optional_data_source}\n
The bulk API commands can be chained together in one line after another and should be in JSON format. It’s important to note that each bulk request must be written on a single line (not pretty printed) and contain the new line character \n at the end of each line.
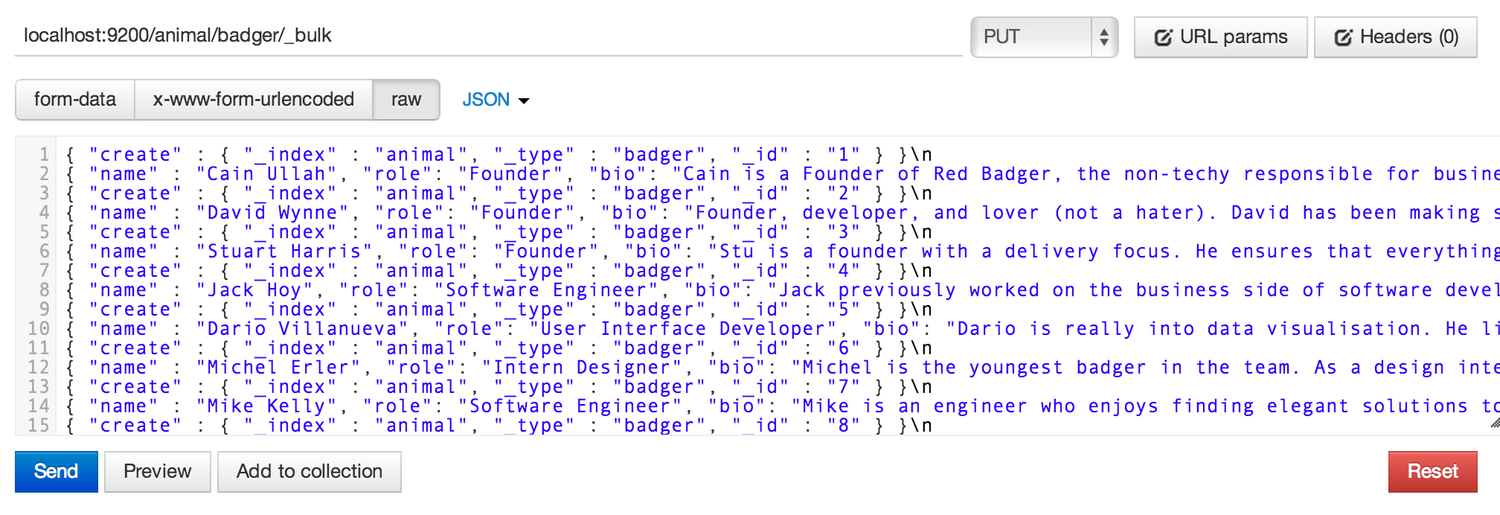
We can send a PUT request to localhost:9200/animal/badger/_bulk with the JSON data for the team at Red Badger which you can copy and paste from here.
Here we are sending our Elasticsearch server a create action with the meta data that specifies the index, type and id where the new document should be placed. The second line is our data source, specifying the name, role and bio for each badger:
 After pressing send you will receive a large response which should confirm that each badger document has been successfully created. You can double check by sending a GET request to
 localhost:9200/animal/badger/1 which returns the badger document with id of 1.
Searching
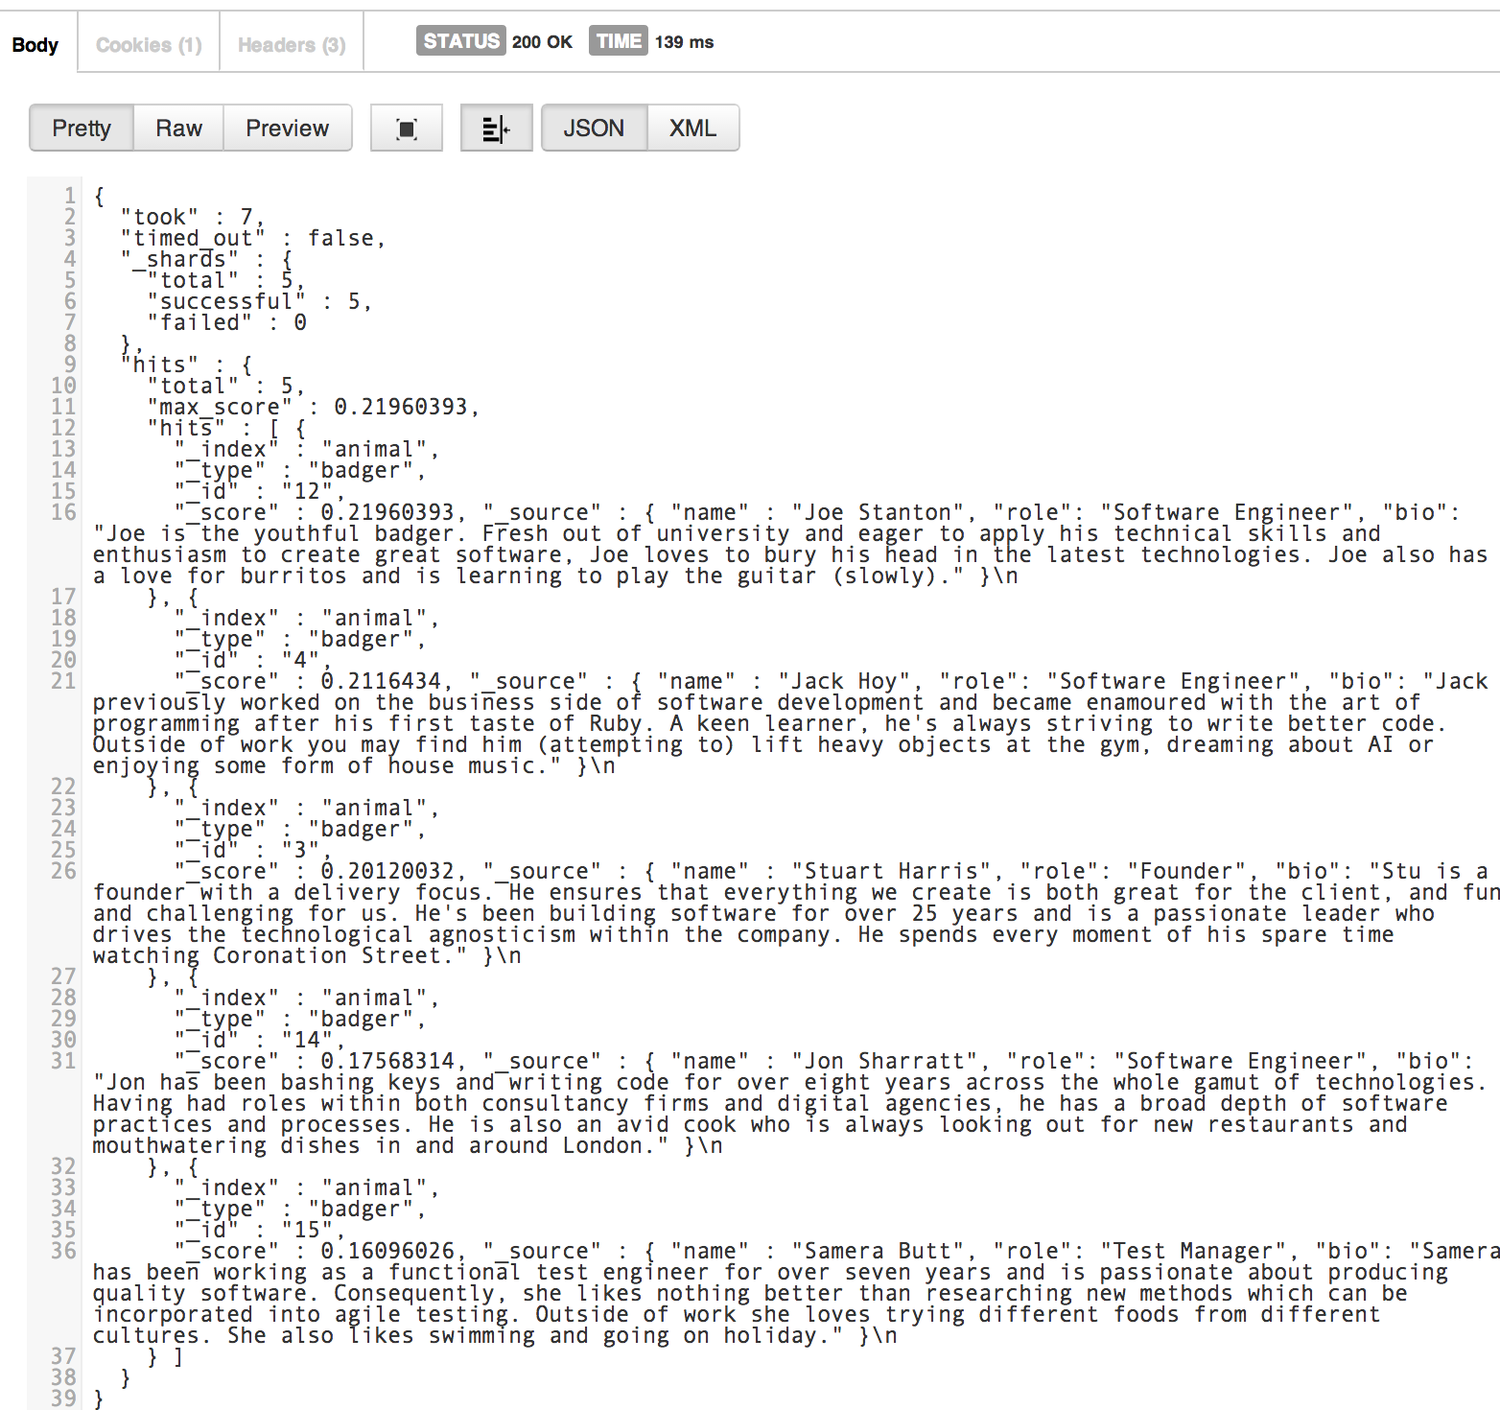
Let’s say we wanted to know which of the badgers had included the word software in their bio field. We can simply send a POST request to localhost:9200/animal/badger/_search?pretty=true (note: the ?pretty=true parameter is optional and is used to make the output more readable).
We need to submit some raw JSON with the request informing the server of the query that we wish to run - as you can see we are specifying that we want to find matches for the word software within the bio field:

After clicking send you will see the response output to the body, showing us that we have 5 hits:
Congratulations, you’ve just set up your first Elasticsearch index, created a type with a mapping, added some sample data and executed your first search query!
Conclusion
As you can imagine there’s a whole lot more you can do with Elasticsearch and we’ve barely scratched the surface but hopefully you found this to be a useful introduction. I’d recommend your next step is to start exploring the official documentation which will give you an idea of the many different types of queries that you can construct.
[1] An alternative browser extension you may wish to try out is Sense - it has built in autocomplete for Elasticsearch which is really useful when creating more complex queries.
This post first appeared on red-badger.com